Pixelation versus Palette Reduction
Compare pixelation, palette reduction, and their combination on one photo. See which changes shape, which changes color, and how to reproduce each result.

Pixelation reduces spatial detail; palette reduction limits the colors used to describe that detail. A blocky photo can still have many colors. A limited-palette photo can still have fine edges. Combining both operations gives you deliberate control over the size of each cell and the colors it can use.
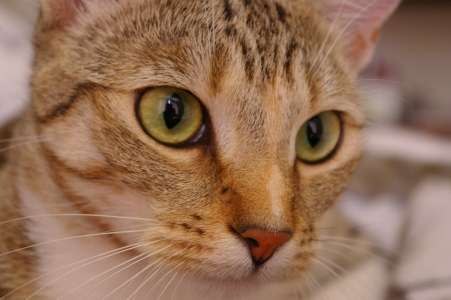
The four examples below use the same cat photo, unchanged framing, and the Pixel Art effect. Dithering stays off so you can see each operation separately.
Use one source for a fair comparison
Download the cat photo PNG
(451 × 300). Open the converter, choose the file, and keep the original canvas size. Use one Pixel Art effect, Mix 100%, Dithering 0%, and no animation.

Pixelation changes the spatial structure
Set Pixel size to 8 and Palette to Original Colors. Each square cell uses one sampled photo pixel. Fur and whiskers become broader shapes, but the sampled colors still come from the photo.

A large cell can skip a thin feature entirely. Pixelation is useful when you want visible blocks, but it does not guarantee a small color count. The separate Pixelate effect also works with regular blocks; Mosaic uses irregular cells instead.
Palette reduction changes the color vocabulary
Set Pixel size to 1 and Palette to Retro 16. Each source position can retain fine spatial detail, but its color is mapped to the nearest entry in the preset. Fine fur edges are still present, now grouped into fewer colors.

This differs from Posterize, which reduces each color channel to evenly spaced levels. Channel reduction can produce many combinations; a fixed palette constrains the actual available colors. Palette Map offers a smaller editable palette when you want to choose individual colors.
Combine both choices
Keep Retro 16 and return Pixel size to 8. Now the image has the block structure of the first treatment and the color vocabulary of the second. The cat stays identifiable through its eyes, ears, and face shape, while fine fur texture is simplified.
| Goal | Pixel size | Palette |
|---|---|---|
| Larger blocks, source colors | Increase from 1 | Original Colors |
| Fine edges, fewer colors | 1 | A fixed palette |
| Larger blocks and fewer colors | Increase from 1 | A fixed palette |
Once those choices work, try ordered dithering to suggest intermediate tones with alternating palette colors. It adds texture; it does not restore missed whiskers. Our photo-to-pixel-art walkthrough demonstrates that next step.
Save the version that supports your image
Review the result at its intended display size. Use Mix 100% and PNG export to preserve the palette treatment. The source dimensions remain the output dimensions unless you change the export settings; cell size is not a dedicated sprite-resolution control.
Try the comparison yourself. You can stack other Pixel effects on the same image, and export for free. Multiple image layers and all collections are available in Artfkt for Mac.
These illustrations were rendered with the production Pixel Art effect at time zero. The source photograph is redistribution-permitted, and all three treatments use the exact same image. The article was prepared with AI assistance and checked against the controls and rendered examples.
Make something unexpected
Keep exploring in Artfkt.
Bring all collections and multiple image layers together in one Mac studio. Build a look, shape its motion, and save your next starting point.