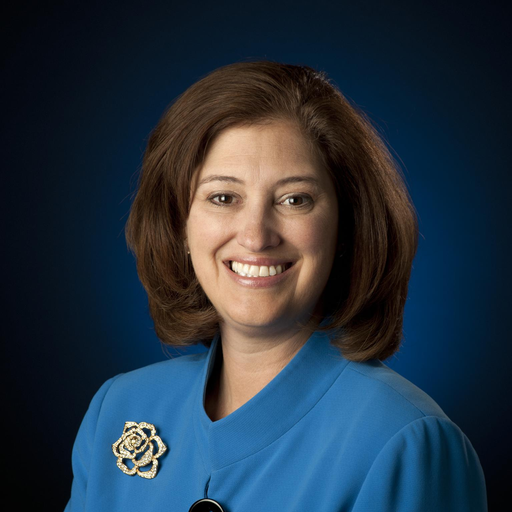
Make a Pixel Art Profile Picture from a Photo
Frame a square photo, choose a cell size that keeps the face readable, and check it at thumbnail size before you export a PNG.

To make a pixel art profile picture from a photo, use a square canvas with the face centered and a margin for a circular crop, then pick a Pixel size that still leaves enough cells on the face. Export a PNG at that canvas size. The Pixel Art effect does the sampling and the palette.
Try these exact settings to load the practice photo at Pixel size 8, Center sampling, Retro 16, Dithering 0%, and Mix 100%. Change one setting at a time, or choose Use your own image to keep the treatment and replace the photo.
Frame a square before you pixelate
A profile picture is shown in a square, and a circle cut from that square throws away the corners. Keep the face near the middle, with space around it.
This practice photo is already 512 × 512.
Download the practice photo PNG
(512 × 512). Keep it centered at 100% scale, with no rotation, and leave playback paused.

Your own photo opens at its own dimensions. Resize canvas changes the canvas around its center. The photo’s size and position stay where they are, so a smaller canvas crops the overflow equally on opposite sides.
Turn off Lock aspect ratio and set Width and Height to the same number. A square at or below the shorter side crops the longer side around the middle. The 1:1 preset does something different: it keeps the longer side and lengthens the shorter side, which adds canvas instead of cropping the photo.
Select the image layer when you need to reframe. Center on canvas returns the photo to the middle. Scale is a percentage of the original width and keeps the current proportions. Leave a margin around the face. Fit image to canvas shrinks the whole photo until it sits inside the frame. It does not crop the photo to fill the square.
Spend the cells on the face
Pixel size is the width of one cell, in pixels of the canvas. On this 512-pixel-wide photo the counts divide evenly:
| Pixel size | Cells across | What you get |
|---|---|---|
| 16 | 32 | A chunky icon. The face has few cells for eyes and a mouth. |
| 8 | 64 | A readable avatar. Large areas simplify, and the face still has features. |
| 4 | 128 | A detailed portrait. The grid is visible, and the photo stays easy to recognize. |
If a canvas width does not divide evenly, the last column is only the leftover pixels. Cells across is the canvas width divided by Pixel size for these three examples. A larger export file does not add cells. The canvas width does.
Set Palette to Retro 16, Sampling to Center, Dithering to 0%, and Mix to 100%. Change only Pixel size.

Pixel size 8 — 64 cells across. This is the profile-picture starting point.

Open the size 8 recipe, then try 16 and 4 on the same photo. Dithering cannot restore an eye that the cell size skipped. Reduce Pixel size first. Sampling and dithering are covered in Convert a Photo into Pixel Art.
Check the picture at the size people will see
Judge the result small, not only at the full canvas. These are the same Pixel size 8 image, shown at 128, 64, and 40 pixels wide, plus a circle cut from the 128-pixel square. The circle is only a preview of the crop. The converter does not cut the file into a circle.
At 40 pixels the size 8 face is still a face. The size 16 version has fewer cells for the eyes, so it is the one to reject if the small preview looks like a blob. If the circle cuts the hair or the chin, scale the photo down and center it before you export.
Choose a palette for skin and shadow
Retro 16 and Color 32 are fixed presets. Neither one is built from the colors in your photo. At Pixel size 4, Color 32 has more room for skin and shadow. Retro 16 simplifies harder. Compare them before you commit.

Pixel size 4, Color 32, no dithering. Same framing as the Retro 16 portrait above.
Monochrome uses two colors and Green 4 uses four green tones. Original Colors keeps the sampled photo colors, and dithering does nothing in that mode. The Pixel Art guide lists every control.
Export the canvas, not a resized copy of it
Keep Mix at 100% so the file uses the palette colors. In Settings → Export Settings → Quick Export, leave Size at Canvas size and File type at PNG. PNG compression is lossless. Quick Export then saves the canvas you have been judging.
50%, 200%, Custom, and Maximum edge scale that finished picture into another file size. They do not change Pixel size, and they do not add cells across the face. A scaled file can soften the hard edges between cells. Leave Size at Canvas size when you want the cells shown here.
The converter does not remove a background, rebuild a hand-drawn sprite, or export a separate sprite-sized file. The browser demo is one image layer, with free export. Artfkt for Mac adds the other collections and more than one image layer.
Try the square recipe, or read pixelation versus palette reduction if you want to separate the block size from the color limit.
How these examples were made
The pictures are outputs from the Pixel Art effect at the source dimensions, with the settings in the captions, no animation, and a fixed time of zero. Pixel size 16, 8, and 4 with Retro 16, and Pixel size 4 with Color 32, all use Center sampling, Dithering 0%, and Mix 100%. The small previews are those same files displayed smaller on the page. The downloadable source is a public-domain photograph. The article was prepared with AI assistance and checked against the controls and the rendered examples.
Make something unexpected
Keep exploring in Artfkt.
Bring all collections and multiple image layers together in one Mac studio. Build a look, shape its motion, and save your next starting point.